Untuk membuat aplikasi kuis di website bukanlah hal yang sulit. Dengan bantuan dari bahasa pemograman JavaScript, kita dapat membuat aplikasi kuis. Bagaimana cara membuatnya? Yuk buka komputer kamu, dan langsung saja kita mulai membuat kuis sederhana dengan HTML, dan CSS:
1. Buka XAMPP Control Panel, serta aktifkan Apache dan MySql.
2. Buka text editor, seperti Notepad++, atau Dreamweaver dan ketiklah script code berikut.
<!DOCTYPE html>
<html lang="en">
<head>
    <meta charset="UTF-8">
    <title>Kuis dengan JavaScript</title>
    <link rel="stylesheet" href="style.css">
</head>
<body>
    <div id="container">
        <div id="start">Kuis dimulai!</div>
        <div id="quiz" style="display: none">
            <div id="question"></div>
            <div id="qImg"></div>
            <div id="choices">
                <div class="choice" id="A" onclick="checkAnswer('A')"></div>
                <div class="choice" id="B" onclick="checkAnswer('B')"></div>
                <div class="choice" id="C" onclick="checkAnswer('C')"></div>
            </div>
            <div id="timer">
                <div id="counter"></div>
                <div id="btimeGauge"></div>
                <div id="timeGauge"></div>
            </div>
            <div id="progress"></div>
        </div>
        <div id="scoreContainer" style="display: none"></div>
    </div>
    <script src="quiz.js"></script>
</body>
</html>
Simpan script code di atas, simpan di folder xampplite – htdocs – buat folder baru (disini saya buat folder baru dengan nama “kuis”) – saya simpan dengan nama file “index.php”.
3. Untuk melihat hasil script code di atas, kamu bisa buka browser kamu ketiklah http://localhost/kuis.
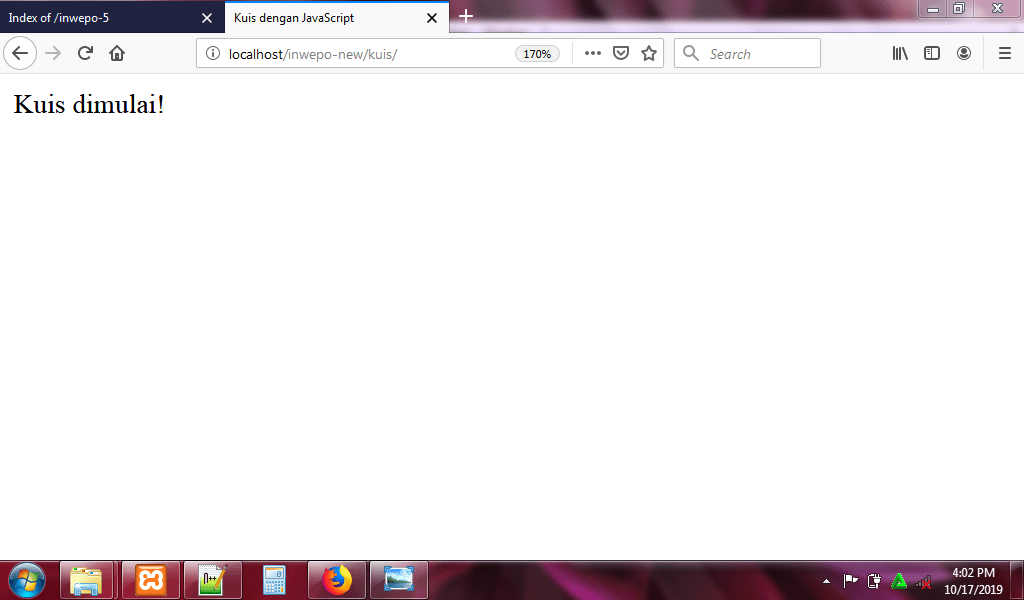
4. Gambar di atas hanya menunjukan link ‘kuis dimulai!’. Untuk memperbaiki tampilan kuis, dan agar aplikasi kuis dapat berjalan, kita perlu menambahkan kode CSS dan JavaScript. Pertama kita akan menambahkan kode CSS terlebih dahulu, buka kembali lembar kerja baru di Notepad++ dan ketikkan kode CSS berikut:
body{
    font-size: 20px;
    font-family: monospace;
	background-color: pink;
}

#container{
    margin : 20px auto;
   background-color: #2c3e50;
    height: 300px;
    width : 700px;
    border-radius: 5px;
    box-shadow: 0px 5px 15px 0px;
    position: relative;
}
#start{
    font-size: 1.5em;
    font-weight: bolder;
    word-break: break-all;
    width:250px;
    height:50px;
    border : 2px solid lightgrey;
    text-align: center;
    cursor: pointer;
    position: absolute;
    left:230px;
    top:50px;
    color : lightgrey;
}
#start:hover{
    border: 3px solid lightseagreen;
    color : lightseagreen;
}

#qImg{
    width : 200px;
    height : 200px;
    position: absolute;
    left : 0px;
    top : 0px;
}
#qImg img{
    width : 200px;
    height : 200px;
    border-top-left-radius: 5px;
}

#question{
    width:500px;
    height : 125px;
    position: absolute;
    right:0;
    top:0;
}
#question p{
    margin : 0;
    padding : 15px;
    font-size: 1.25em;
	color:#fff;
}

#choices{
    width : 480px;
    position: absolute;
    right : 0;
    top : 125px;
    padding : 10px;
	color:#fff;
}
.choice{
    display: inline-block;
    width : 135px;
    text-align: center;
    border : 1px solid grey;
    border-radius: 5px;
    cursor: pointer;
    padding : 5px;
}
.choice:hover{
    border : 2px solid grey;
    font-weight: bold;
}

#timer{
    position: absolute;
    height : 100px;
    width : 200px;
    bottom : 0px;
    text-align: center;
}
#counter{
    font-size: 3em;
}
#btimeGauge{
    width : 150px;
    height : 10px;
    border-radius: 10px;
    background-color: lightgray;
    margin-left : 25px;
}
#timeGauge{
    height : 10px;
    border-radius: 10px;
    background-color: mediumseagreen;
    margin-top : -10px;
    margin-left : 25px;
}
#progress{
    width : 500px;
    position: absolute;
    bottom : 0px;
    right : 0px;
    padding:5px;
    text-align: right;
}
.prog{
    width : 25px;
    height : 25px;
    border: 1px solid #000;
    display: inline-block;
    border-radius: 50%;
    margin-left : 5px;
    margin-right : 5px;
}
#scoreContainer{
    margin : 20px auto;
    background-color: white;
    opacity: 0.8;
    height: 300px;
    width : 700px;
    border-radius: 5px;
    box-shadow: 0px 5px 15px 0px;
    position: relative;
    display: none;
}
#scoreContainer img{
    position: absolute;
    top:100px;
    left:325px;
}
#scoreContainer p{
    position: absolute;
    display: block;
    width : 59px;
    height :59px;
    top:130px;
    left:325px;
    font-size: 1.5em;
    font-weight: bold;
    text-align: center;
}
Simpan script code di atas, simpan di folder xampplite – htdocs – buat folder baru (disini saya buat folder baru dengan nama “kuis”) – saya simpan dengan nama file “style.css”.
5. Reload http://localhost/kuis.
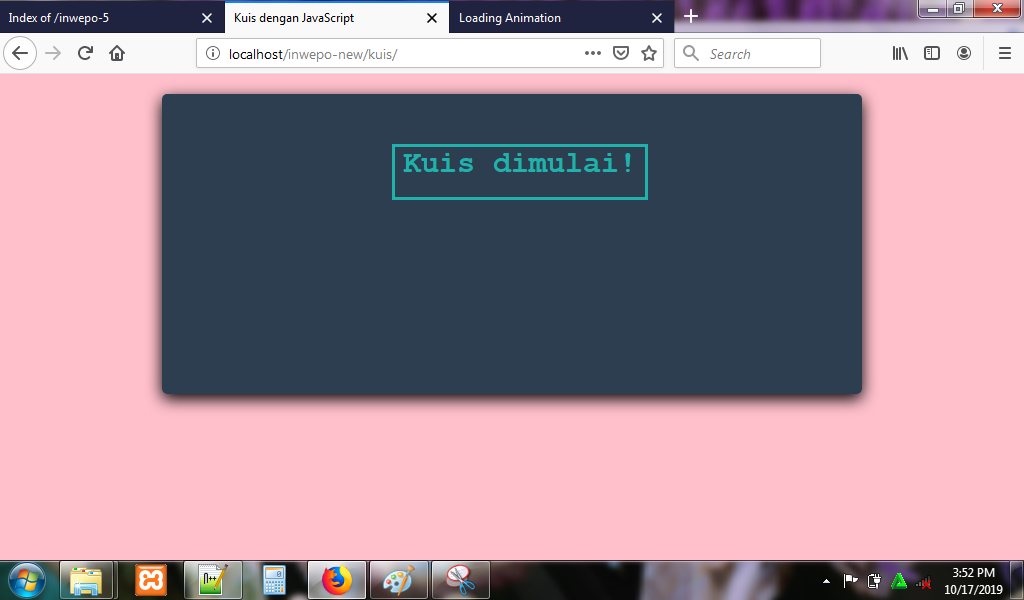
6. Agar aplikasi kuis dapat berjalan, buka lembar kerja baru di Notepad++, dan ketikkan kode javascript berikut:
// select all elements
const start = document.getElementById("start");
const quiz = document.getElementById("quiz");
const question = document.getElementById("question");
const qImg = document.getElementById("qImg");
const choiceA = document.getElementById("A");
const choiceB = document.getElementById("B");
const choiceC = document.getElementById("C");
const counter = document.getElementById("counter");
const timeGauge = document.getElementById("timeGauge");
const progress = document.getElementById("progress");
const scoreDiv = document.getElementById("scoreContainer");

// create our questions
let questions = [
    {
        question : "Apakah ini simbol dari HTML5?",
        imgSrc : "img/html.png",
        choiceA : "Benar",
        choiceB : "Salah",
        choiceC : "Salah",
        correct : "A"
    },{
        question : "Apakah ini simbol dari CSS3?",
        imgSrc : "img/css.png",
        choiceA : "Salah",
        choiceB : "Benar",
        choiceC : "Salah",
        correct : "B"
    },{
        question : "Apakah ini simbol dari JavaScript?",
        imgSrc : "img/js.png",
        choiceA : "Salah",
        choiceB : "Salah",
        choiceC : "Benar",
        correct : "C"
    }
];

// create some variables

const lastQuestion = questions.length - 1;
let runningQuestion = 0;
let count = 0;
const questionTime = 10; // 10s
const gaugeWidth = 150; // 150px
const gaugeUnit = gaugeWidth / questionTime;
let TIMER;
let score = 0;

// render a question
function renderQuestion(){
    let q = questions[runningQuestion];

    question.innerHTML = "<p>"+ q.question +"</p>";
    qImg.innerHTML = "<img src="+ q.imgSrc +">";
    choiceA.innerHTML = q.choiceA;
    choiceB.innerHTML = q.choiceB;
    choiceC.innerHTML = q.choiceC;
}

start.addEventListener("click",startQuiz);

// start quiz
function startQuiz(){
    start.style.display = "none";
    renderQuestion();
    quiz.style.display = "block";
    renderProgress();
    renderCounter();
    TIMER = setInterval(renderCounter,1000); // 1000ms = 1s
}

// render progress
function renderProgress(){
    for(let qIndex = 0; qIndex <= lastQuestion; qIndex++){
        progress.innerHTML += "<div class='prog' id="+ qIndex +"></div>";
    }
}

// counter render

function renderCounter(){
    if(count <= questionTime){
        counter.innerHTML = count;
        timeGauge.style.width = count * gaugeUnit + "px";
        count++
    }else{
        count = 0;
        // change progress color to red
        answerIsWrong();
        if(runningQuestion < lastQuestion){
            runningQuestion++;
            renderQuestion();
        }else{
            // end the quiz and show the score
            clearInterval(TIMER);
            scoreRender();
        }
    }
}

// checkAnwer

function checkAnswer(answer){
    if( answer == questions[runningQuestion].correct){
        // answer is correct
        score++;
        // change progress color to green
        answerIsCorrect();
    }else{
        // answer is wrong
        // change progress color to red
        answerIsWrong();
    }
    count = 0;
    if(runningQuestion < lastQuestion){
        runningQuestion++;
        renderQuestion();
    }else{
        // end the quiz and show the score
        clearInterval(TIMER);
        scoreRender();
    }
}

// answer is correct
function answerIsCorrect(){
    document.getElementById(runningQuestion).style.backgroundColor = "#0f0";
}

// answer is Wrong
function answerIsWrong(){
    document.getElementById(runningQuestion).style.backgroundColor = "#f00";
}

// score render
function scoreRender(){
    scoreDiv.style.display = "block";

    // calculate the amount of question percent answered by the user
    const scorePerCent = Math.round(100 * score/questions.length);

    // choose the image based on the scorePerCent
    let img = (scorePerCent >= 80) ? "img/5.png" :
              (scorePerCent >= 60) ? "img/4.png" :
              (scorePerCent >= 40) ? "img/3.png" :
              (scorePerCent >= 20) ? "img/2.png" :
              "img/1.png";

    scoreDiv.innerHTML = "<img src="+ img +">";
    scoreDiv.innerHTML += "<p>"+ scorePerCent +"%</p>";
}
Simpan script code di atas, simpan di folder xampplite – htdocs – buat folder baru (disini saya buat folder baru dengan nama “kuis”) – saya simpan dengan nama file “quiz.js”.
7. Reload http://localhost/kuis.
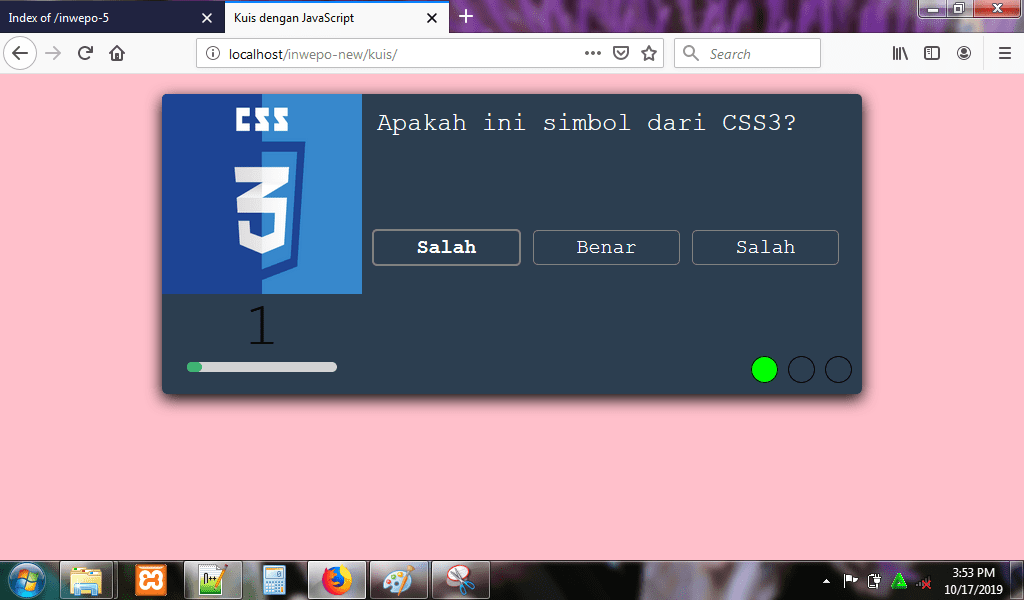
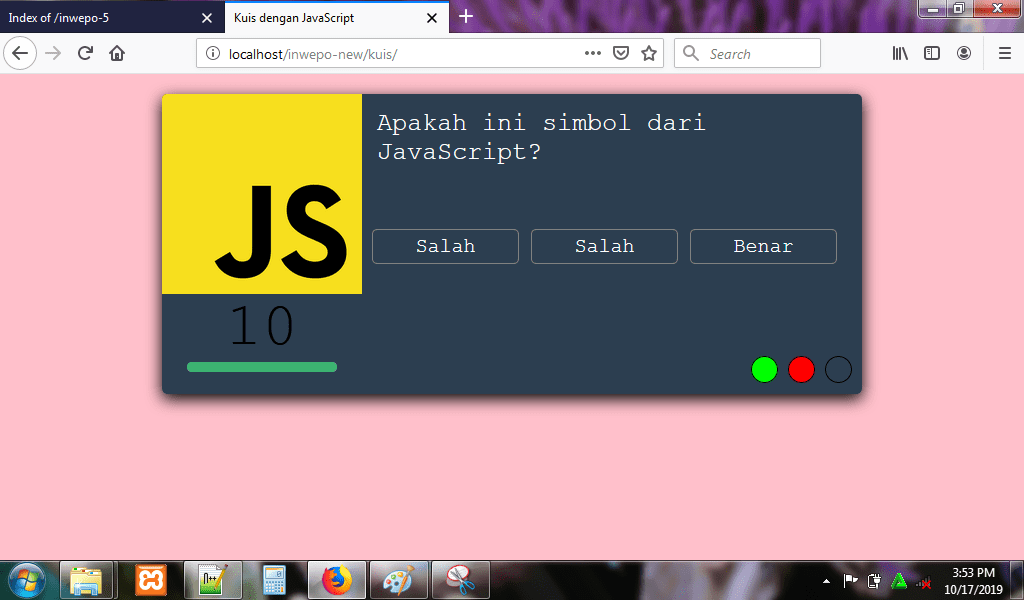
Setiap pertanyaan akan diberi waktu 10 detik.
Tampilan ketika benar menjawab pertanyaan tombol akan berwarna hijau.
Tampilan ketika salah menjawab pertanyaan tombol akan berwarna merah.
Hasil akan ditampilkan dengan nilai dan emoji.
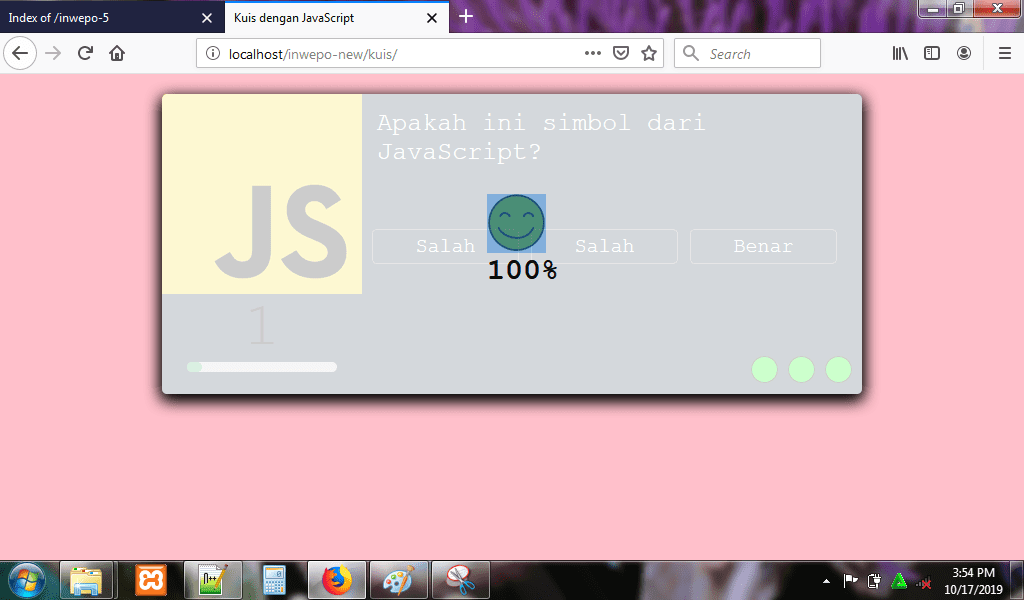
8. Untuk gambar dan emoji, kamu bisa download disini
Download gambar kuis sederhana
https://drive.google.com/file/d/1wvQm1UrHE2h5fA61tHEK7jTp2pQYQNuf/view
Demikian penjelasan dari tutorial tentang ‘Cara Membuat Kuis dengan JavaScript’. Selamat mencoba.


rahmat
November 20, 2019 at 02:33
mantap lur semoga berkah ilmunya
umira
Januari 9, 2020 at 16:46
makasih infonya bermanfaat kak,
Gimana cara menambah pertanyaannya kak?
Makasih.