Dengan bahasa pemrograman JavaScript, kita dapat dengan mudah membuat sebuah catatan to do list. Bagaimana cara membuatnya? Yuk buka komputer kamu, dan kita akan membuat catatan to do list dengan JavaScript.
Tutorial
1. Buka XAMPP Control Panel, serta aktifkan Apache.
2. Buka program teks editor yang ter-install di komputer kamu, disini saya menggunakan teks editor Notepad++. Ketikkan kode HTML5 berikut ini.
<!DOCTYPE html>
<html>
<head>
    <meta charset='utf-8'>
    <meta http-equiv='X-UA-Compatible' content='IE=edge'>
    <title>to do List</title>
    <meta name='viewport' content='width=device-width, initial-scale=1'>
    <link rel='stylesheet' type='text/css' media='screen' href='style.css'>
    <link href="https://fonts.googleapis.com/css?family=Hind&display=swap" rel="stylesheet">
    <link rel="stylesheet" href="path/to/font-awesome/css/font-awesome.min.css">
    <script src="https://kit.fontawesome.com/a81368914c.js"></script>
</head>
<body>
    <h1><span class="title">to do </span>List</h1>
    <div class="inputDiv">
    	   <input type="text" class="input" placeholder="Apa yang ingin kamu lakukan...?">
    	   <button class="add"><i class="fas fa-plus"></i></button>
    </div>
    <div class="container">
    </div>
    <script src='main.js'></script>
</body>
</html>
Simpan kode HTLM5 di atas di folder xampplite – htdocs – buat folder baru dengan nama ToDoList – simpan kode di atas dengan nama index.html.
3. Untuk melihat hasil script code di atas, kamu bisa buka browser kamu ketiklah http://localhost/ToDoList.
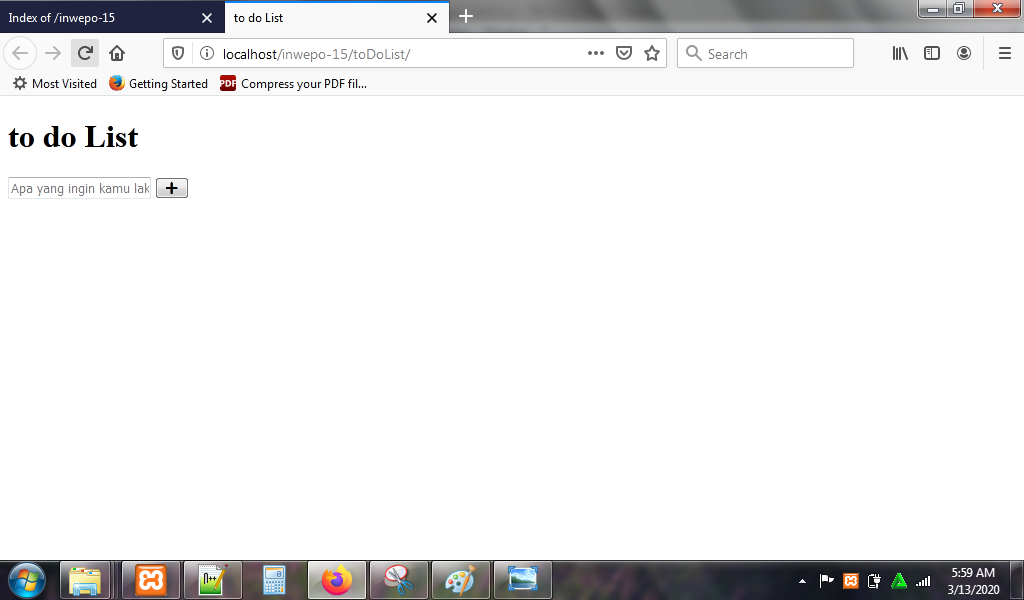
4. Ketikkan kode CSS3 berikut ini.
* {
    margin: 0;
    padding: 0;
    box-sizing: border-box;
}

body{
    height: 100%;
    background-color: #800000;
    box-sizing: border-box;
}

h1 {
	color: #fff;
	font-size: 3rem;
	font-weight: 50;
	text-align: center;
	margin: 1rem 0 3rem;
	font-family: 'Hind', sans-serif;
}

.title{
	color: #ff69b4;
	text-transform: uppercase;
	font-weight: 800;
}

.inputDiv{
	display: flex;
	justify-content: center;
	align-items: center;
}

.input{
    padding: 0.5rem 1rem;
    outline: none;
    border: none;
    height: 50px;
    border-radius: 25px;
    width: 350px;
    margin: 0.25rem;
    transition: .5s;
    font-size: 1.15rem;
}

.add{
	outline: none;
    border: none;
    height: 50px;
    border-radius: 25px;
    width: 50px;
    background-color: #ff69b4;
    color: white;
    cursor: pointer;
    transition: .5s;
    margin: 0.25rem;
}

.add:hover{
	opacity: 0.7;
}

.container{
	display: flex;
	flex-direction: column;
	justify-content: center;
	align-items: center;
	text-align: center;
	margin-top: 2rem;
}

.item{
	padding: 0.5rem;
	border-bottom: 4px solid #fff;
	margin-bottom: 1.5rem;
}

.item_input{
	background: none;
	outline: none;
	border: none;
	color: #fff;
	font-size: 1.4rem;
	width: 245px;
}

.edit{
	background: none;
	outline: none;
	border: none;
	color: lime;
	font-size: 1.4rem;
	font-family: 'Hind', sans-serif;
	margin: 0 0.5rem;
	cursor: pointer;
}

.remove{
	background: none;
	outline: none;
	border: none;
	color: #E00;
	font-size: 1.4rem;
	font-family: 'Hind', sans-serif;
	cursor: pointer;
}
Simpan kode CSS3 di folder xampplite – htdocs – buat folder baru dengan nama ToDoList – simpan code CSS3 dengan nama style.css.
5. Reload alamat url : http://localhost/ToDoList. Tampilan awal to do list.
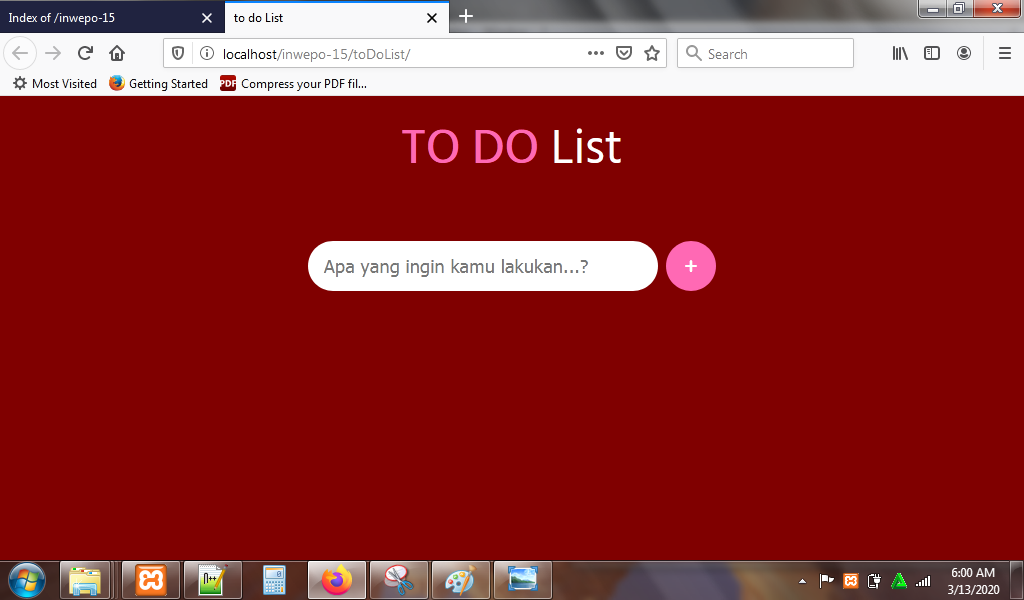
Namun, catatan to do list belum bisa digunakan.
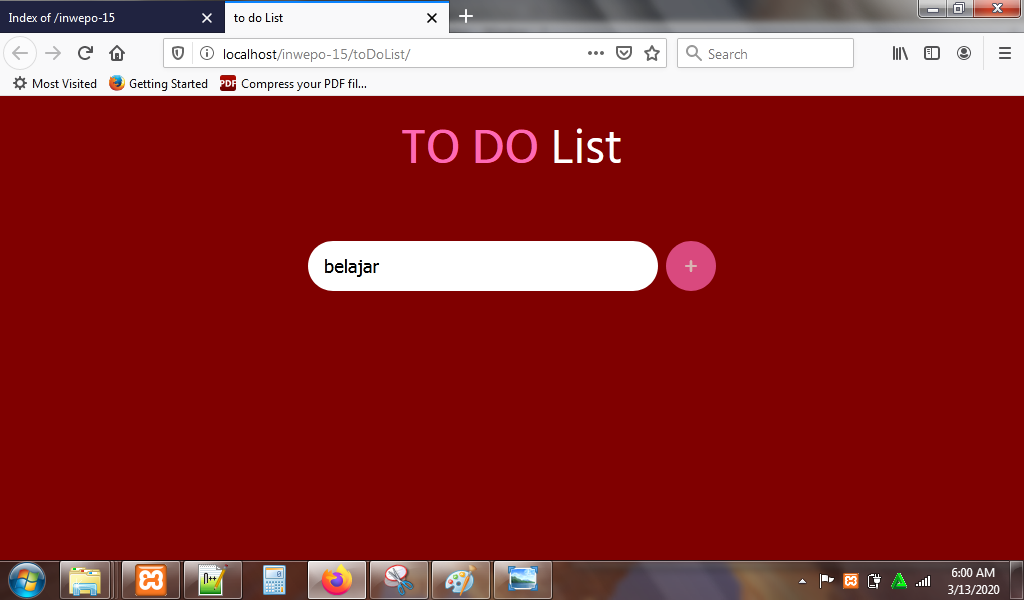
6. Untuk mengaktifkan fitur to do list, ketikkan kode JavaScript berikut di lembar baru teks editor.
/*
   this code will save the todo items even you refresh the page
*/

const container = document.querySelector('.container');
var inputValue = document.querySelector('.input');
const add = document.querySelector('.add');

if(window.localStorage.getItem("todos") == undefined){
     var todos = [];
     window.localStorage.setItem("todos", JSON.stringify(todos));
}

var todosEX = window.localStorage.getItem("todos");
var todos = JSON.parse(todosEX);


class item{
	constructor(name){
		this.createItem(name);
	}
    createItem(name){
    	var itemBox = document.createElement('div');
        itemBox.classList.add('item');

    	var input = document.createElement('input');
    	input.type = "text";
    	input.disabled = true;
    	input.value = name;
    	input.classList.add('item_input');

    	var edit = document.createElement('button');
    	edit.classList.add('edit');
    	edit.innerHTML = "EDIT";
    	edit.addEventListener('click', () => this.edit(input, name));

    	var remove = document.createElement('button');
    	remove.classList.add('remove');
    	remove.innerHTML = "REMOVE";
    	remove.addEventListener('click', () => this.remove(itemBox, name));

    	container.appendChild(itemBox);

        itemBox.appendChild(input);
        itemBox.appendChild(edit);
        itemBox.appendChild(remove);

    }

    edit(input, name){
        if(input.disabled == true){
           input.disabled = !input.disabled;
        }
    	else{
            input.disabled = !input.disabled;
            let indexof = todos.indexOf(name);
            todos[indexof] = input.value;
            window.localStorage.setItem("todos", JSON.stringify(todos));
        }
    }

    remove(itemBox, name){
        itemBox.parentNode.removeChild(itemBox);
        let index = todos.indexOf(name);
        todos.splice(index, 1);
        window.localStorage.setItem("todos", JSON.stringify(todos));
    }
}

add.addEventListener('click', check);
window.addEventListener('keydown', (e) => {
	if(e.which == 13){
		check();
	}
})

function check(){
	if(inputValue.value != ""){
		new item(inputValue.value);
        todos.push(inputValue.value);
        window.localStorage.setItem("todos", JSON.stringify(todos));
		inputValue.value = "";
	}
}


for (var v = 0 ; v < todos.length ; v++){
    new item(todos[v]);
}


new item("berolahraga");
Simpan kode CSS3 di folder xampplite – htdocs – buat folder baru dengan nama ToDoList – simpan code CSS3 dengan nama main.js.
7. Reload alamat url : http://localhost/ToDoList. Isi field, klik icon tambah. Sekarang fitur to do list sudah aktif.
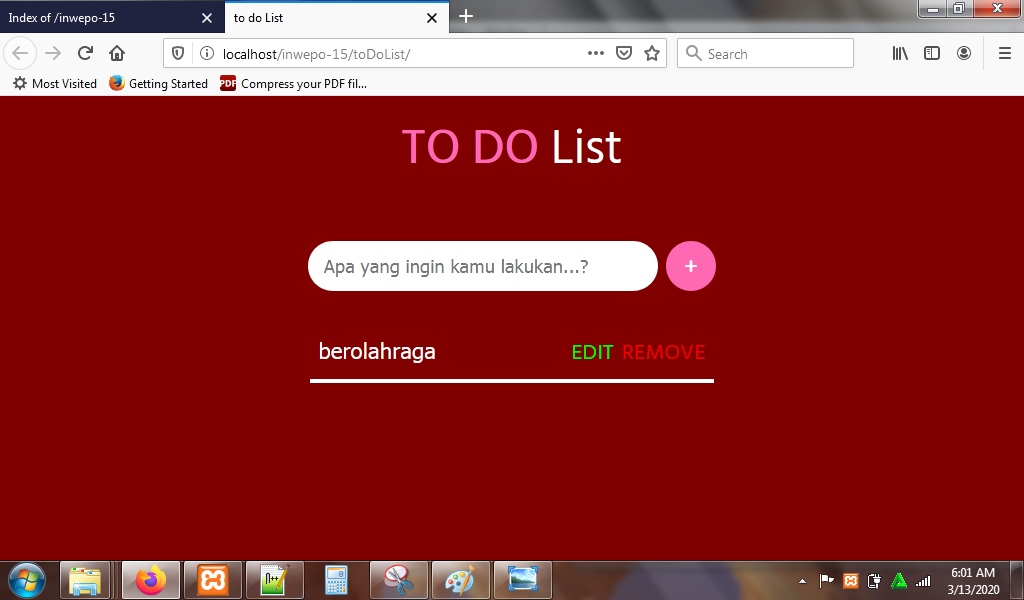
Klik tombol edit untuk mengubah kegiatan, dan klik tombol remove untuk menghapus kegiatan.
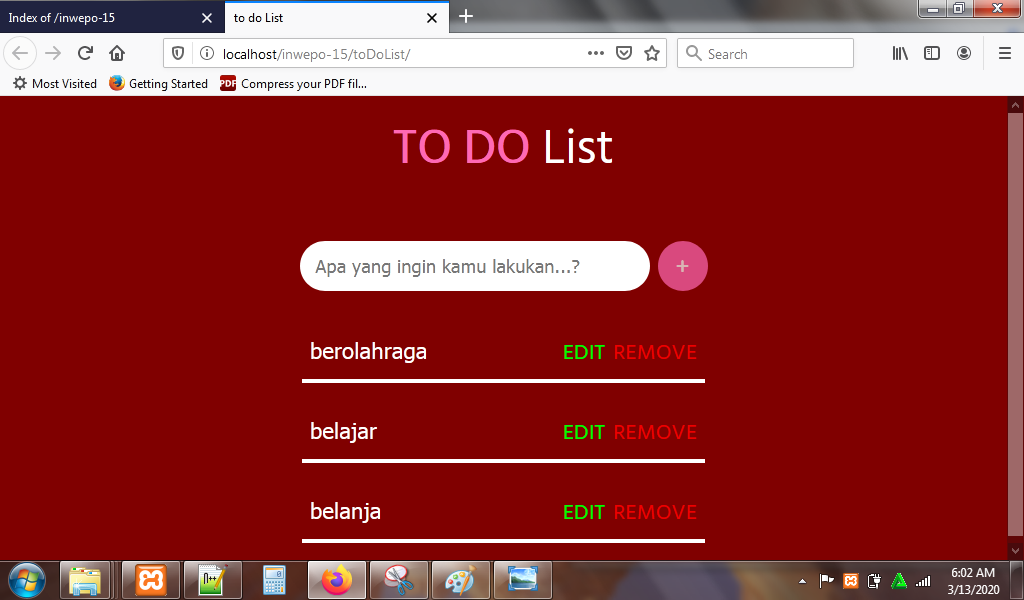
8. Selesai. Menarik sekali bukan?.
Demikian penjelasan dari tutorial ‘Cara Membuat Catatan To Do List dengan JavaScript’. Selamat mencoba.


